SocialDog offers various settings to streamline your daily operations. This article introduces useful settings for managing multiple SNS accounts, collaborating with teams, and configuring notifications.
Managing multiple SNS accounts
SocialDog allows you to connect and centrally manage multiple SNS accounts. This is useful for switching between multiple accounts, such as a corporate account and individual brand accounts.
*The number of accounts you can connect depends on your plan. For details on the limits for each plan, please check Features available for each plan.
Adding an SNS account
- Open SNS accounts.
- Click "Add SNS account".
- The login screen for the SNS will appear. Enter the credentials for the account you want to connect and log in.
- Once logged in, the SNS account will be added.
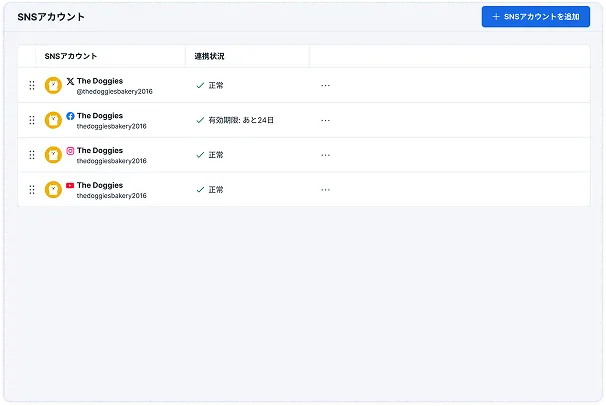
Removing a connected SNS account
- Open SNS accounts.
- From the list of connected accounts, click the "..." icon for the account you want to remove and select "Delete."
*Even if you disconnect an account, you can still view data collected during the previous connection period if you reconnect it later.
Multi-user management
What is a team?
A "team" is a feature that allows multiple users to collaborate on managing SNS accounts. When you register for SocialDog, a "default team" is automatically created for each user.
The relationship between teams, SocialDog accounts, and SNS accounts is as follows:
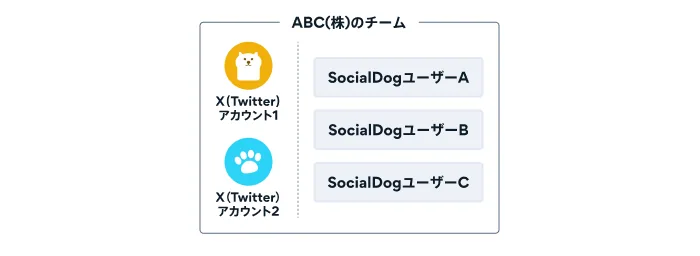
- A single SocialDog account can belong to multiple teams.
- Users (SocialDog accounts) belonging to a team can manage the SNS accounts connected to that team (posting, analytics, follower management, etc.).
- The same SNS account cannot be connected to multiple teams.
When you upgrade to a paid plan, the subscription is linked to the team.
If a team is on the Enterprise plan or Business plan, all users in that team can use the features of that plan. However, they cannot use Enterprise plan or Business plan features in other teams they belong to.
Related articles:
Team usage examples
For example, if three PR representatives (Person A, Person B, and Person C) want to manage two X accounts, follow these steps:
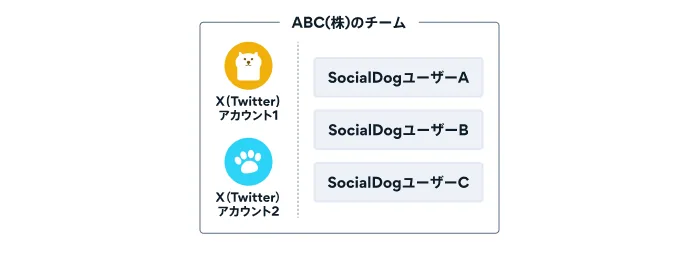
- Person A (the team administrator) connects the two X accounts they want to manage to the team.
- Person A invites Person B and Person C to the team.
- Once the invitation is complete, Person A, Person B, and Person C will all be able to manage the two X accounts connected to the team.
Related articles:
Inviting other users to a team
By inviting other users to a team, multiple members can collaborate on managing SNS accounts. Management by up to 20 people is possible.
Available plans
To invite other SocialDog users to a team, the team must be on the Enterprise plan or Business plan.
Steps to invite other users
- Click the icon in the bottom left of the screen.
- Click "Team members."
- Click "Invite user."
- Select the email address to invite and their role in the team (Administrator or Member).
- Click "Send invitation."
Invited users can join the team by clicking the link in the email from SocialDog and either setting a password (if not registered) or entering their password (if already registered).
Set team member roles
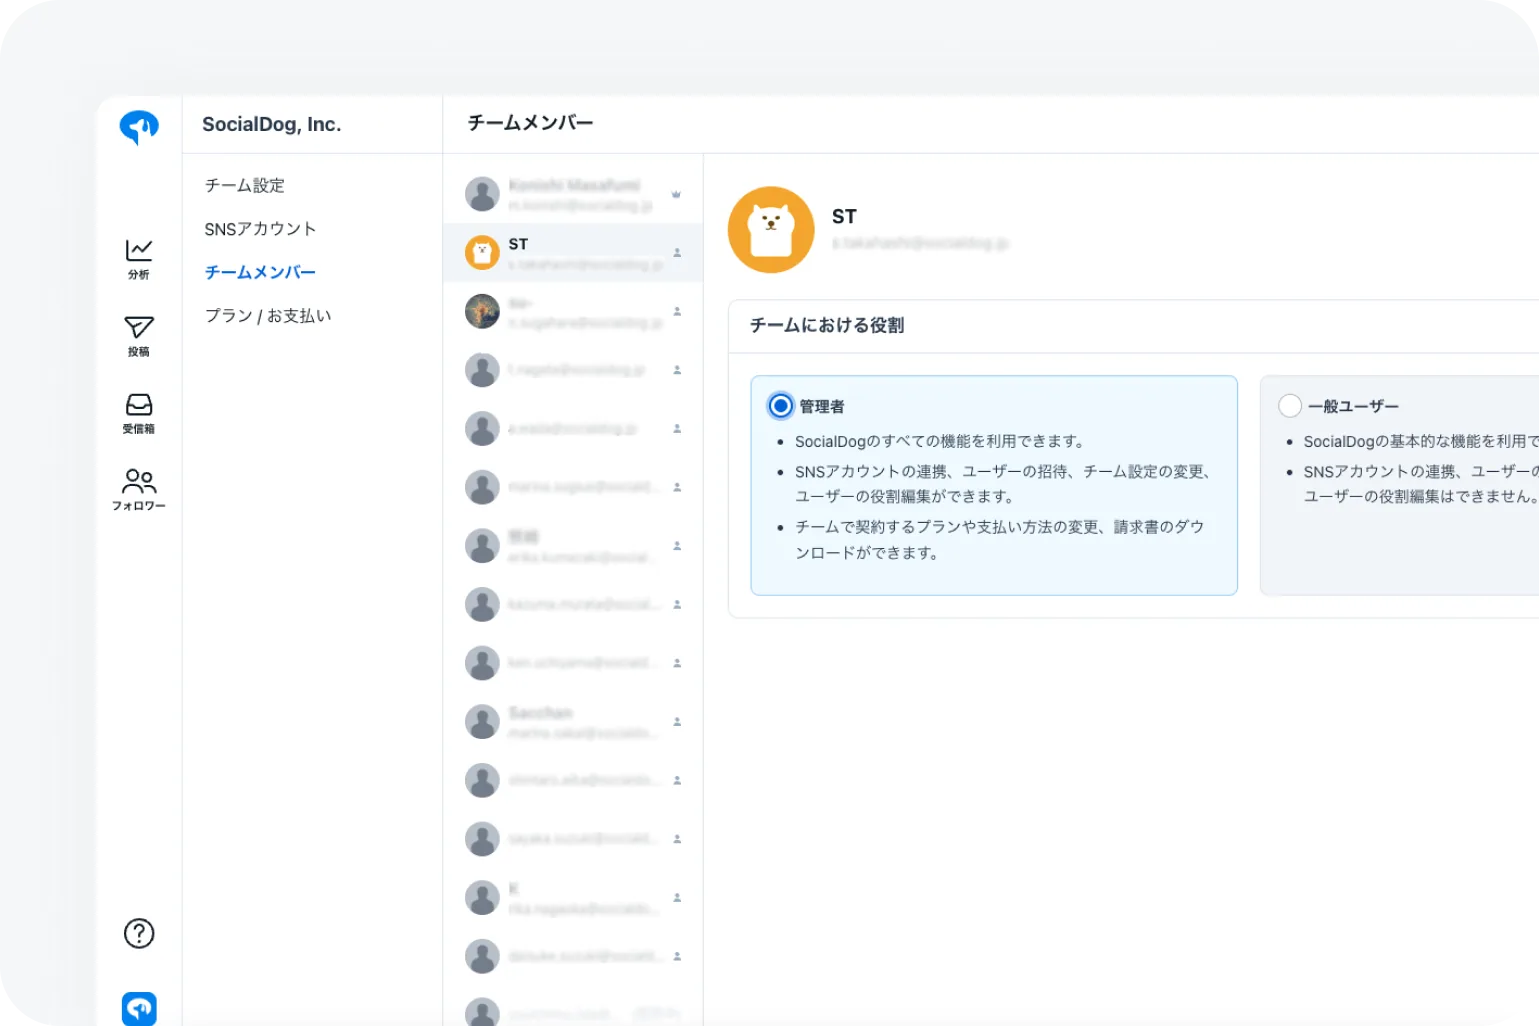
Team owners can assign two types of roles to team members: "Admin" and "Member." There is only one owner per team, and by default, the team creator becomes the owner. Billing is also linked to the owner.
The actions available for each role are as follows.
| Action | Owner | Admin | Standard user |
| Basic features (Analytics, Posts, Inbox, Follower management) | Available | Available | Available |
| Change team settings (Add SNS accounts, invite users, edit roles, etc.) | Available | Available | – |
| Plan / Billing (Change plans, payment methods, etc.) | Available | Available | – |
| Delete team | Available | – | – |
To change a role, open "Team members" from the icon in the bottom left, click the user, and select "Team role." This action can only be performed by owners and admins.
If you need to change the owner due to resignation or other reasons, click the current owner on the "Team members" screen and select a new owner from "Transfer ownership." This action requires the current owner's SocialDog account password.
Related articles:
Manage posting permissions for each SNS account
You can limit the scope of actions for each team member on a per-SNS account basis. Currently, permissions for creating, editing, and deleting scheduled posts are supported.
Roles per SNS account
- Post Editor: Can create and edit drafts.
- Cannot create scheduled posts or post immediately.
- Features other than posting (Analytics, Keyword Monitor, Follower management, etc.) can be used without restrictions.
- SNS Account Admin: Can perform all posting actions.
Please check the table below for details.
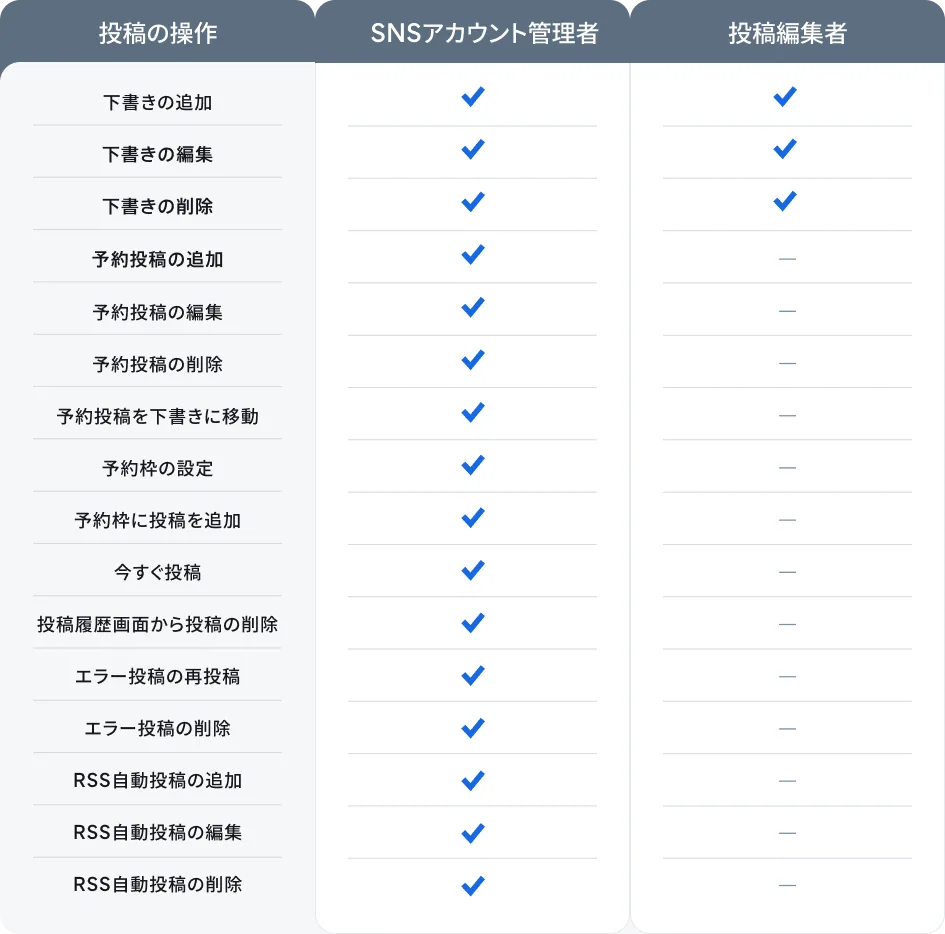
This allows for workflows where specific members are only permitted to create drafts for admin review before posting, and helps prevent accidental posts to SNS accounts they are not responsible for.
Immediately after connecting an SNS account, the member who connected it is automatically set as the "SNS Account Admin," and other team members are set as "Post Editors." Please set roles for each SNS account from the "Team members" screen according to your actual workflow.
Related articles:
Notification settings
SocialDog allows you to receive notifications via email, push notifications, and Slack. It is useful to set these up so you don't miss essential information like Daily reports and notifications about scheduled posts.
All notification settings can be changed from "Notifications" within "Account settings."
Email notifications
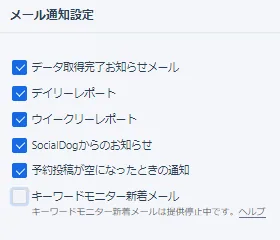
You can receive updates from SocialDog via email. The types of notifications you can receive are as follows:
- Data retrieval completion notification
- Daily report
- Weekly report
- Updates from SocialDog
- Notification when scheduled posts are empty
Steps to enable/disable
- Open "Notifications" in "Account settings."
- Check the items you want to receive (uncheck to disable).
- Click "Save."
Push notifications
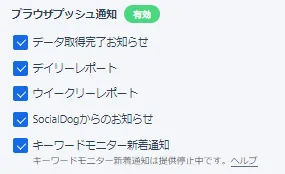
Receive SocialDog notifications via browser push notifications. This is convenient for staying updated even when the page is closed.
You can receive the following types of notifications:
- Data retrieval completion notification
- Daily report
- Weekly report
- Updates from SocialDog
Steps to enable/disable
- Open "Notifications" in "Account settings."
- If push notifications are "Disabled," click "Enable."
- Check the items you want to receive (uncheck to disable).
- Click "Save."
Slack notifications
Receive SocialDog notifications via browser push notifications. This is convenient for staying updated even when the page is closed.
You can receive the following types of notifications:
- Daily report
- Weekly report
- New @tweets (*Business / Enterprise plans only)
* Slack notifications are configured for each SNS account. Private channels are not supported. Please ensure the Slack channel you want to connect is public.
Setup steps
- Open "Slack notifications."
- Click "Add."
- After connecting to Slack, select the SNS account and notification settings, then click "Add."
Removal steps
- Open "Slack notifications."
- Click "Delete" to the right of the notification you want to remove.
- Click "Delete" again on the confirmation screen.
* Deleted notification settings cannot be restored.
Related articles: